Attracting Pollinators
Why are pollinators important?
Many of our favorite foods and drinks rely on pollinators to bear their fruit (coffee, tea, cocoa, sugarcane, tomatoes, peaches, apples, strawberries, etc.) and they contribute to healthy plants and a healthy garden ecosystem!
Who are the pollinators?
- Ants - plants pollinated by ants are typically low growing, have small inconspicuous flowers that are close to the stem. (e.g. wild ginger)
- Bees – prefer yellow, blue, & purple flowers and flowers with UV light (e.g. bee balm). Small bees, which have short tongues, prefer packed clusters of tiny flowers (e.g. marigold, daisy, butterfly weed, aromatic herbs).
- Bats – Pollinating bats are typically found in the Southwest. Prefer light-colored, night-blooming flowers with strong odor (many types of cactus).
- Butterflies – prefer red, orange, yellow, pink, blue flowers with flat-topped clusters for landing (e.g., zinnia, calendula, butterfly weed, yarrow, & daisy) in a sunny location. They also need food sources for larvae and places to lay eggs (milkweed, aster, lupine, thistle, fennel, violets, hollyhock, & black-eyed susan).
- Flies – Attracted to green, white, or cream flowers. They have short tongues, so prefer simple, bowl shapes.
- Hummingbirds – prefer red, orange, purple/red tubular flowers with lots of nectar (honeysuckle, sage, fuchsia, jewelweed, fireweed, cardinal flower, bee balm, nasturtium, century plant). No landing areas are needed since they hover while feeding.
- Pollinating Beetles - prefer wide-open flowers (aster, sunflower, rose, & butterfly weed).
- Moths – prefer light-colored flowers that open at dusk such as evening primrose.
Native Bees
There are about 4,000 species of native bees in the U.S. ranging in length from less than one eighth of an inch to more than one inch. Most of these bees are "solitary" nesting and, having no hive to defend (as do non-native honeybees), they are unlikely to sting!
Steps to Attract Pollinators
Plant plenty of nectar and pollen-rich flowers (in patches 3’-4’ in diameter). Choose flowers with a range of shapes and sizes that bloom throughout the season. Bees are color sensitive and attracted to fragrance. Use containers to grow your plants if space is limited (or to bring inside at night when temperatures get cold). Use as many plants native to your region as possible.
- Provide food sources (host plants and feeders) and over-wintering places for eggs and larvae.
- Provide water (small pond, mud puddle or a birdbath).
- Avoid using any pesticides or herbicides. Growing a diverse selection of crops and using native plants will create an ecosystem that regulates pests naturally)
- Provide sites and materials for nesting and over-wintering, and make stick and stake nests for native bees.
- Make a butterfly or hummingbird feeder.
To learn more about the characteristics that attract specific pollinators to a certain flower, please check out the USDA's Pollinator Syndrome Traits Table.
How to Make a Butterfly Feeder
Butterfly nectar is made by boiling 4 parts water with 1 part organic cane sugar. Stir until dissolved, and cool completely before adding it to the feeder. Large batches can be made in advance and stored in the refrigerator for 3 weeks. (This is the same food that is used in hummingbird feeders as well.)
Decorate a glass jar by gluing brightly colored silk or plastic artificial flowers to it or painting bright colors on the outside of it. Waterproof electrical tape in a color that butterflies like (such as red) can also be used to attach artificial flowers. This tape is available in most hardware stores.
Next, punch a small hole in the jar lid by placing it on a piece of wood and hammering a large nail through its center.
Remove the lid, fill the jar with butterfly nectar, and stuff a piece of cotton or a clean sponge into the hole on the inside of the lid. The sponge or cotton should be a tight fit – trim as necessary.
Screw the lid back on tightly, and use wire or twine to hang it upside down (so that the hole faces the ground) in an open, sunny area, ideally near colorful flowers. Butterflies will suck the nectar through the cotton or sponge.
Stick Nests
Stick nests are most easily made from straight lengths of dry, pithy wood. Elderberry, sumac, and chinaberry are all convenient. Branches or twigs are cut 6-8" long for horizontal stick bundles, a foot or more for stake nests. In all cases, one end is drilled to a depth of 4-6" using a sharp twist drill. Useful hole diameters range from 3/16"-7/16" (5-12mm). Pith fragments should be knocked out of the hole. Then, stick nests are bundled together (with wire) and hung horizontally.
Stake Nests
For stake nests, a small notch is cut in the side of the branch, and a pilot
hole drilled into the pith. This will be used by some small body bee species that prefer to excavate the pith themselves. Stake nests are then pushed vertically into the ground.
At the end of the nesting season, stick nests bundles and stake nests can be recovered from the field and stored in a shady place at ambient temperatures. They are easily split to reveal any content of nests (there are likely to be wasp nests too, that had been provisioned with paralyzed spiders or insects).
Nesting Blocks
A drilled length of fire wood is another easy alternative to use at home instead of drilled nesting blocks. Use dry wood and drill across the grain to obtain a smooth hole. The blue orchard bee responds well to this sort of nesting substrate. Face the holes southeastward where they will receive morning sun. In subsequent years, drill more holes to minimize re-use of old holes (and any bee diseases that they may contain). The USDA has an excellent guide to nest block preparation.
A Few Suggested Plants to Attract Pollinators - by Season
If you're allergic to bees, either avoid planting these altogether or place them in out-of-the-way areas.
Spring
- Annuals and Perennials
- Ajuga reptans (Ajuga)
- Borago officinalis (Borage)
- Chionodoxa luciliae (Glory-of-the-snow)
- Crocus vernus (Spring crocus)
- Pelargonium graveolens (Scented geranium)
- Rosmarinus sp. (Rosemary)
- Trifolium sp. (Clover)
- Trees and Shrubs
- Crataegus sp. (Hawthorn)
- Ilex sp. (Holly)
- Liriodendron tulipifera (Tulip poplar)
- Mahonia aquifolium (Oregon grapeholly)
- Prunus sp. (Flowering cherry)
- Vaccinium elliottii (Blueberry)
Summer
- Annuals and Perennials
- Agastache foeniculum (Anise hyssop)
- Asclepias tuberosa (Butterfly weed)
- Cosmos bipinnatus (Cosmos)
- Echinacea purpurea (Coneflower)
- Hosta sp. (Hosta)
- Lavandula angustifolia (Lavender)
- Monarda didyma (Bee balm)
- Nepeta sp. (Catmint)
- Pelargonium graveolens (Scented geranium)
- Phlox paniculata (Phlox)
- Rudbeckia sp. (Black-eyed susan)
- Stachys byzantina (Lamb's ear)
Fall
- Annuals and Perennials
- Aster sp. (Asters)
- Eupatorium purpureum (Joe pye weed)
- Melissa officinalis (Lemon balm)
- Rudbeckia sp. (Black-eyed susan)
- Salvia elegans (Pineapple sage)
- Solidago sp. (Goldenrod)
- Tithonia rotundifolia (Mexican sunflower)
- Trees and Shrubs
- Caryopteris clandonensis (Blue mist spirea)
- Ilex sp. (Holly)
- Vitex agnus-castus (Chaste tree)
- Plants Specifically for Attracting Hummingbirds
- Aesculus pavia (Red buckeye)
- Aquilegia canadense (Red columbine)
- Campsis radicans (Trumpet creeper)
- Impatiens capensis (Spotted jewelweed)
- Lilium canadense (Canada lily)
- Lobelia cardinalis (Cardinal flower)
- Lonicera sempervirens (Honeysuckle)
- Monarda didyma (Bee balm)
- Rhododendron catawbiense (Catawba rhododendron)
- Spigelia marilandica (Indian pink)
Additional Plant Choices
Here are a few other suggested plants for attracting butterflies and other pollinators: Azalea, Alyssum, Anthemis, Boneset, Buddleia, Candytuft, Lilac, Cosmos, Sumac, Gaillardia, Aubrieta, Dandelion, Dogbane, Viburnum, Marigold, Mignonette Daisy, Scabiosa, Verbena, Zinnia, Primrose, Thistle, Wild Bergamot, Sedum, Yarrow.
Container Gardening
“Population will increase rapidly, more rapidly that in former times, and ‘ere long the most valuable of all arts will be the art of deriving a comfortable subsistence from the smallest area of soil.” -Abraham Lincoln
“They’re making more people every day, but they ain’t makin’ any more dirt.” -Will Rogers
“With every planting not only does your garden grow, but you with it.” -Raymond Chaudiour
Container Gardening Advantages
- Fewer pest and disease problems - and if a problem arises, easier to control
- Easier to control pH balance (soil acidity/alkalinity)
- Better control of water and sunlight
- Extended growing season
- Planting earlier and harvesting later – by bringing plants indoors near sunny windows
- Growing plants indoors in winter time in south-facing windows, some garden plants can do well with as little as 6 hours light per day
- Keeps invasive rhizomes (roots) in check (examples of potentially invasive or spreading plants include: mints, bamboo and raspberries
Containers
Anything can be grown in a container, as long as the container is sized to the plant. For example, you could grow a potato plant in a 5 gallon bucket. I grow squash in 15 gallon washtubs.
Container Materials
- Pots can be made from: clay, fiberglass, plastic, metal and wood (avoid materials that can leach harmful substances, such as old railroad ties, certain metals, etc.)
- Washtubs
- Five gallon buckets
- Wheel barrows
- Old pots and kettles, etc.
- The container is limited only to the gardener’s imagination, but it must have drain holes!
Soil and Amendments
Vermiculite - Made from mica rock that’s been heated to 2000 degrees F, causing it to expand. It’s good for holding air and water as well as providing potassium, calcium and magnesium. It’s pH neutral. (Note, when handling vermiculite and perlite, you want to avoid breathing the dust. Wet it frequently to reduce dust, and wear a mask if necessary.)
Perlite - Made from volcanic rock that’s been heated to 1800 degrees F, causing it to expand like popcorn. It’s good for holding water. It has no nutrient value and is ph neutral.
Bark or Sawdust - Used as a basic ingredient that provides few nutrients.
Limestone - Source of calcium and counteracts the acidity of peat moss.
Leaves and Leaf Mold - Good mulch addition, with few nutrients.
Straw - Another good mulch, with few nutrients.
Composted Manure - Horse, cow, chicken
Peat and Sphagnum Moss - Partially decomposed, centuries old moss. Hold both water and air. Decays slowly, but adds little nutrients. Very acidic.
Soil - From your yard, top soil or potting soil purchased from garden center.
Watering
Don’t overwater. Test with your finger. Be sure to drain any standing water that is left in the drip tray if using drip trays. It is vitally important that your containers are well-drained!
Sunlight
The amount is the same as for non-container plants. Follow garden catalog or seed packet.
Fertilizers
See our Organic Standards for a full list of recommended fertilizers.
Garden Features
Fun Garden Features
The thing that sets a school garden apart from any other kind of garden are the interactive and fun elements that can be included! We have identified some easy, fun, and impactful elements that will elevate a school garden from just a few garden boxes to a truely engaging teaching space.
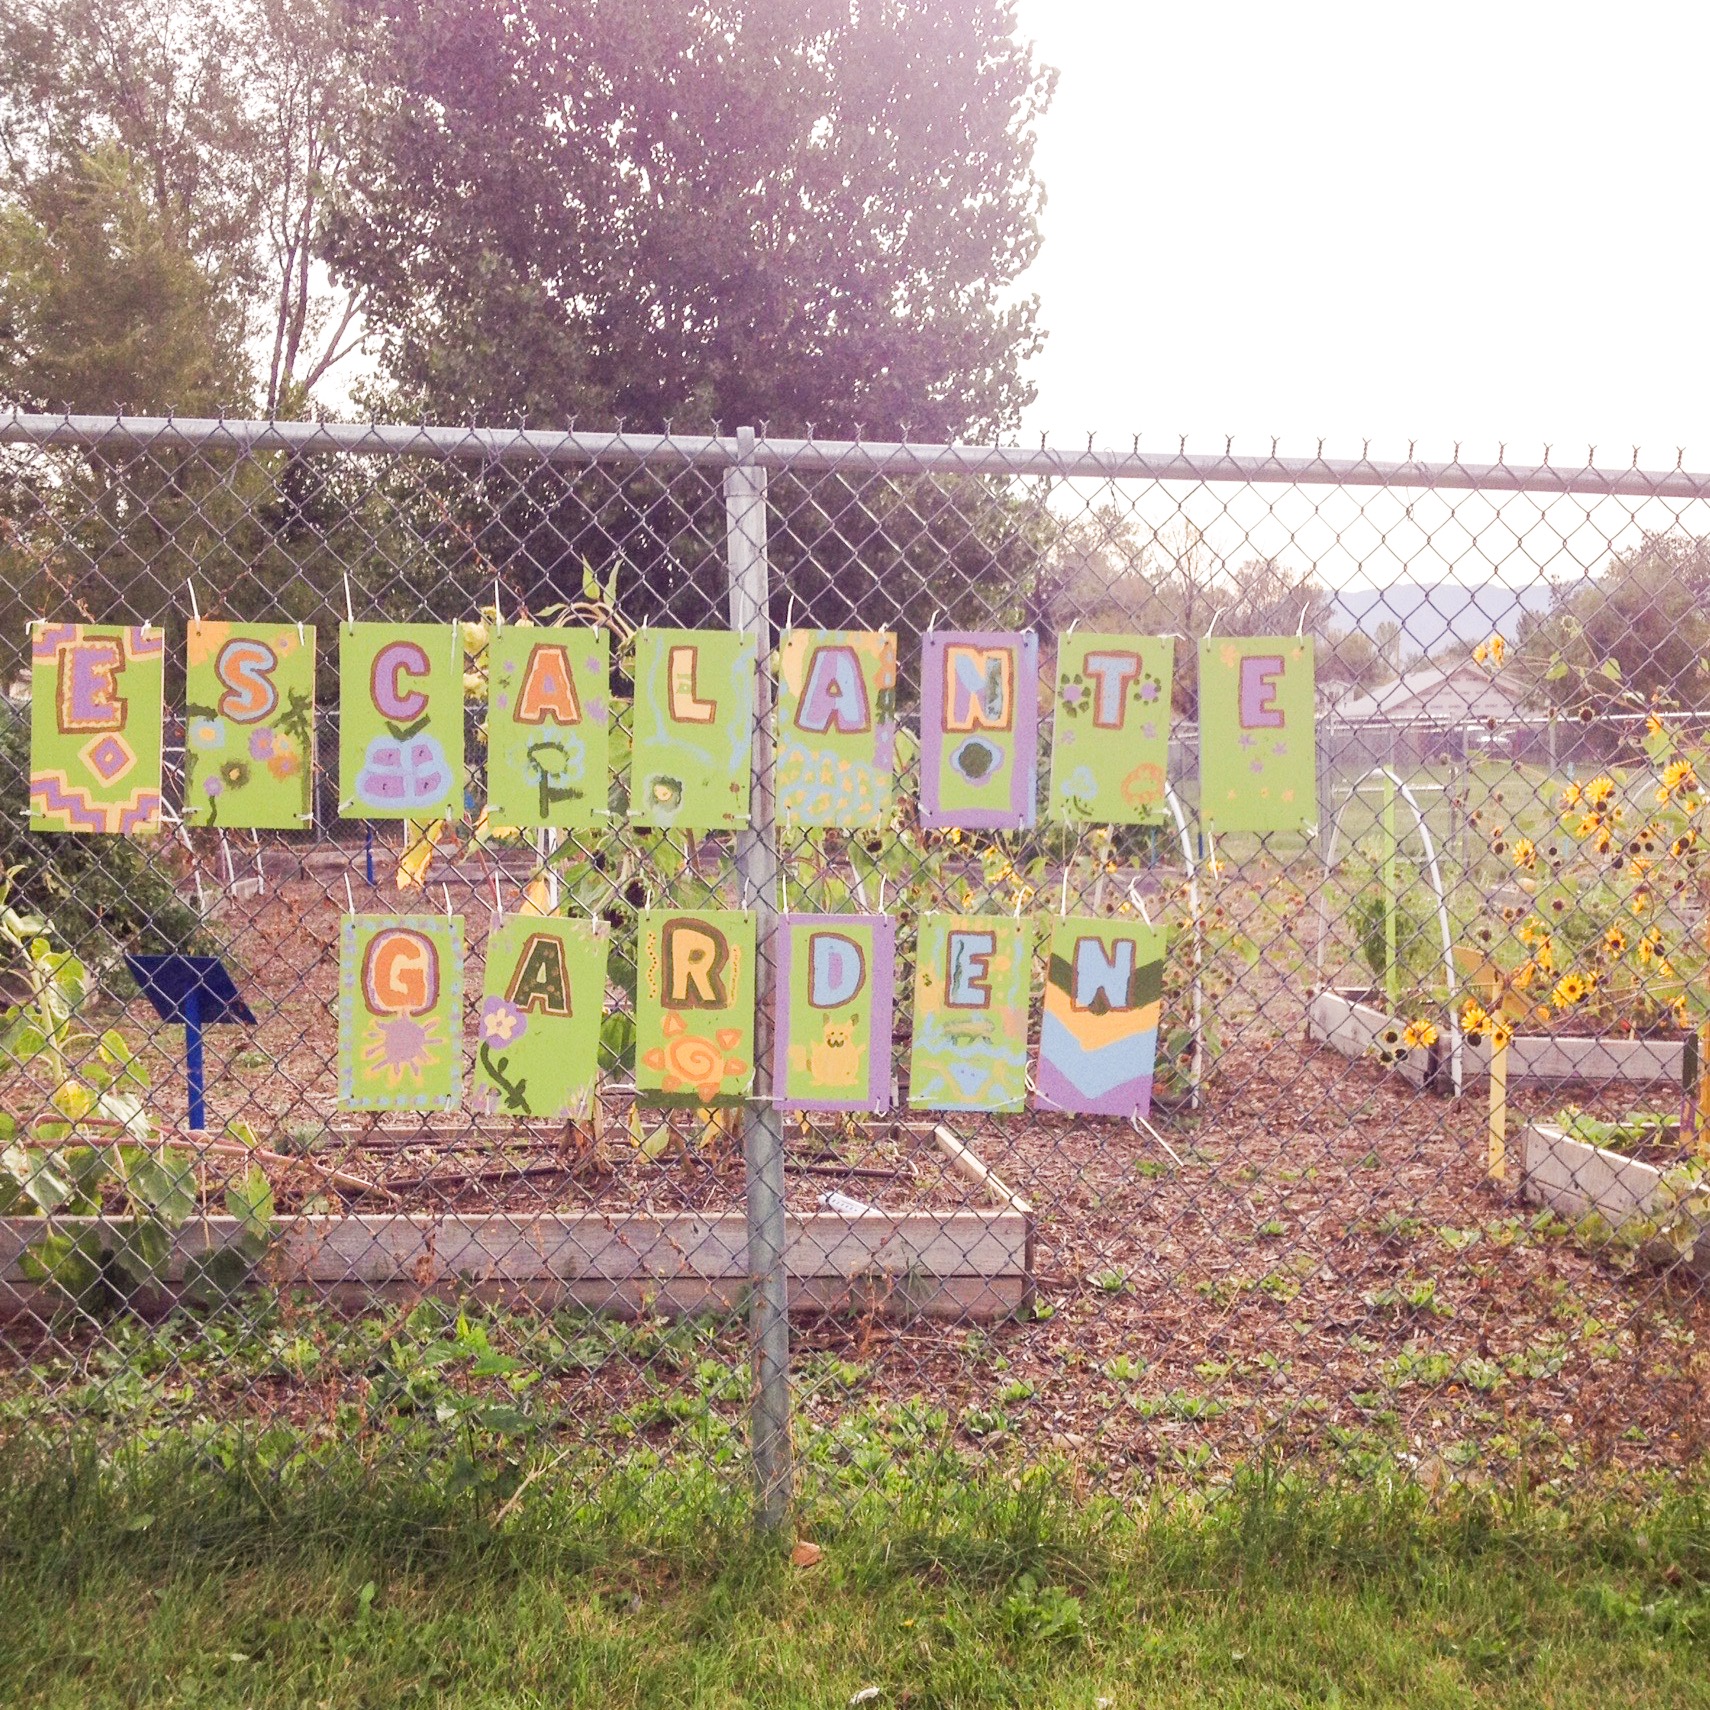
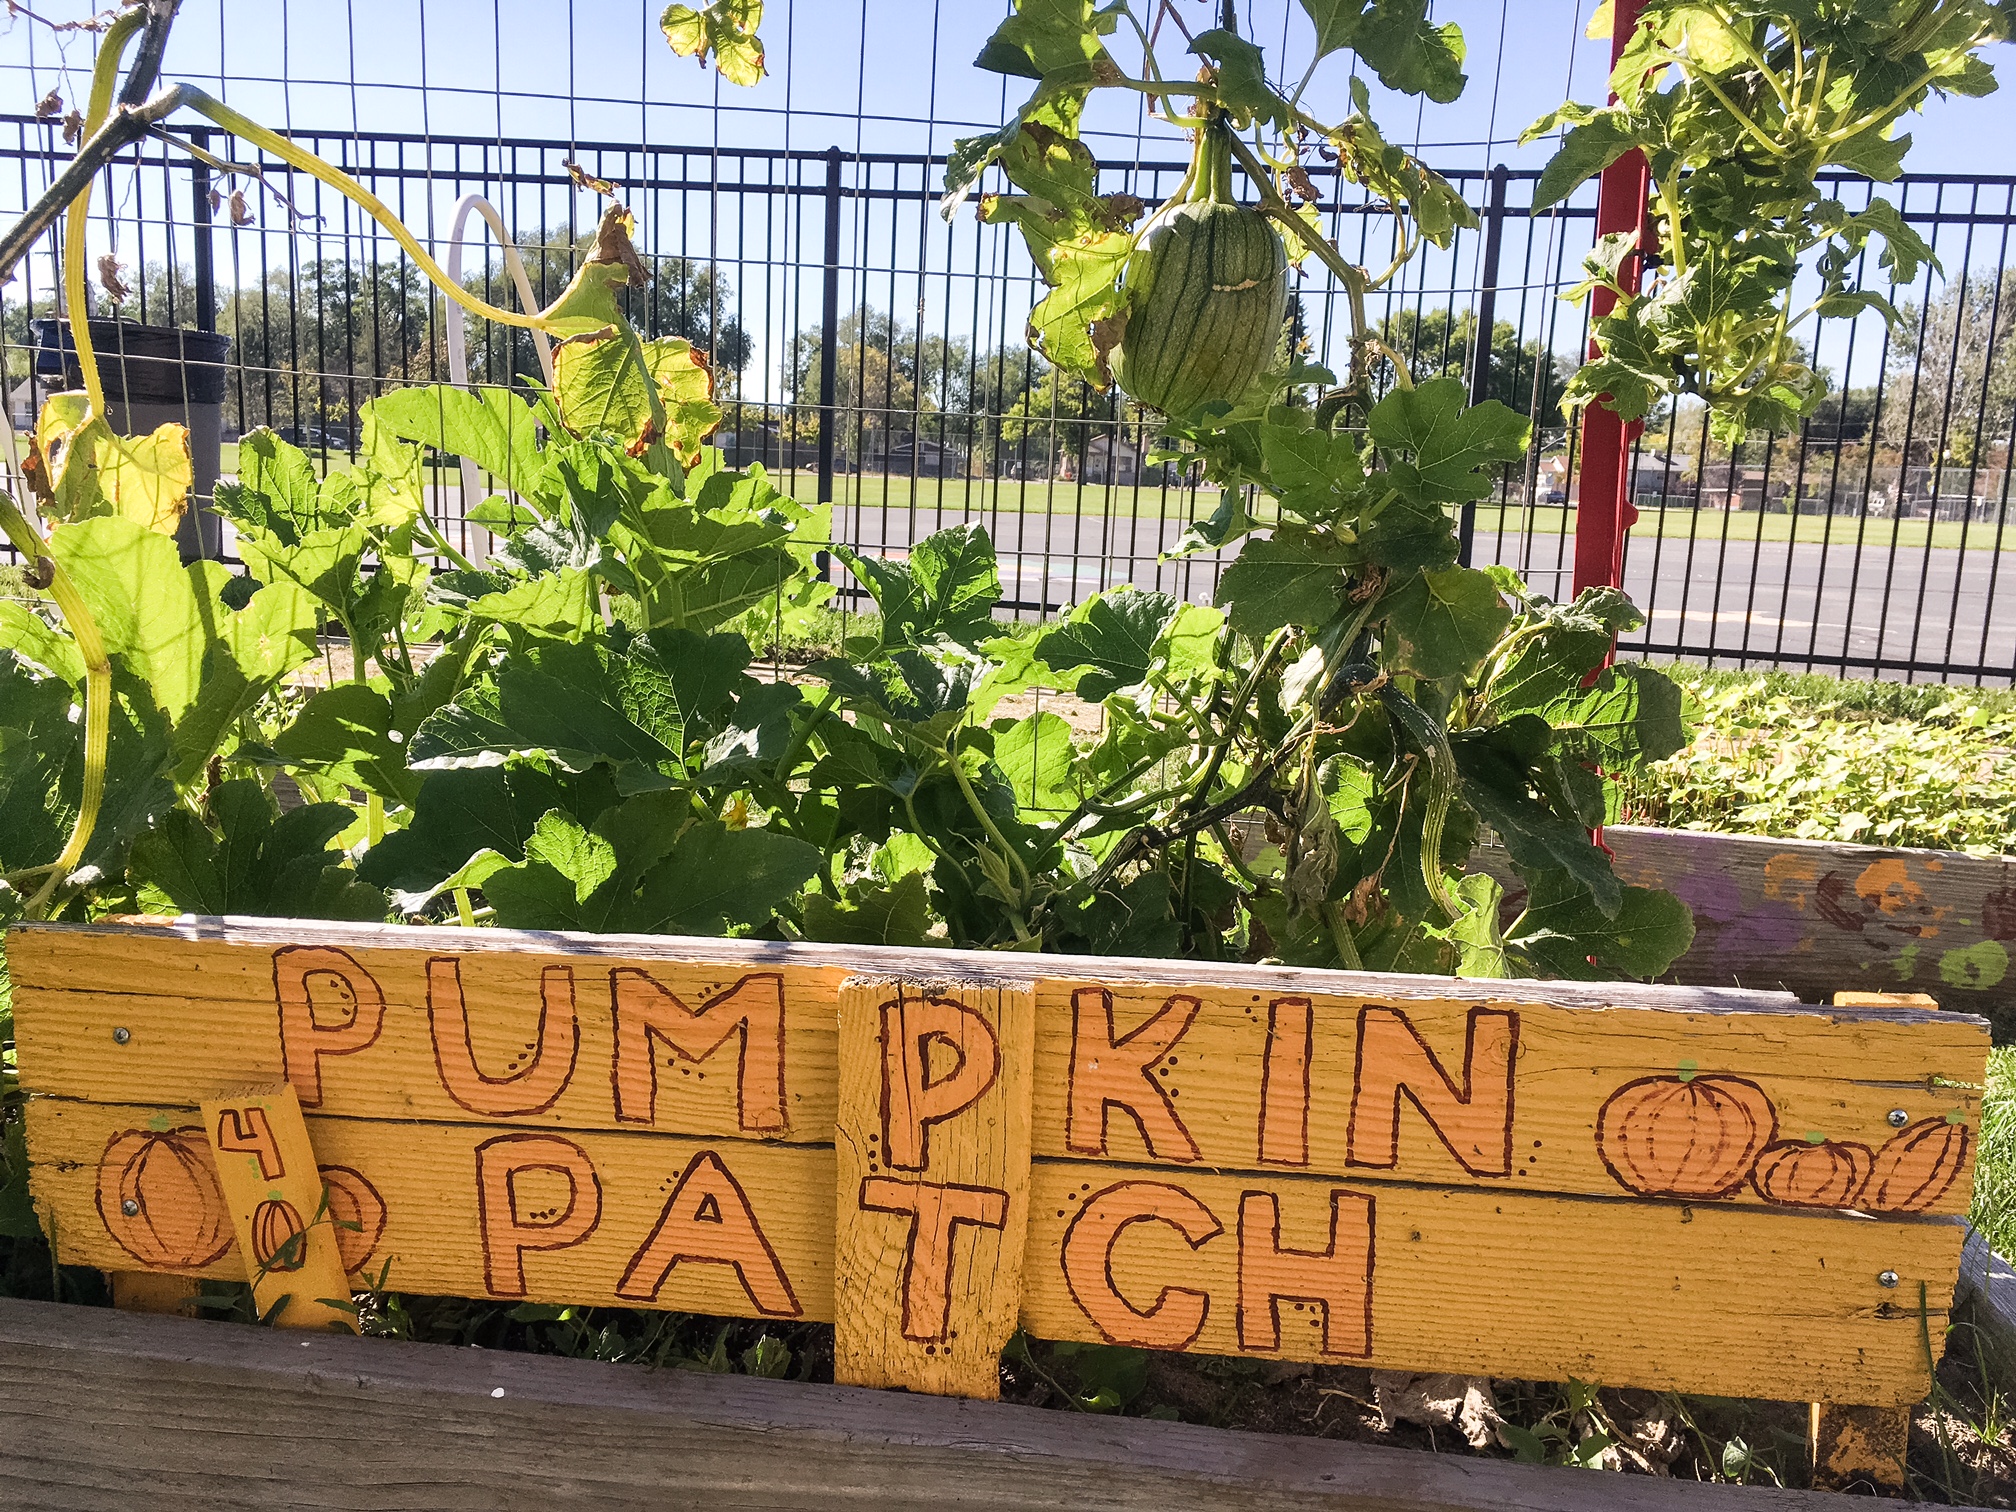
Garden Sign
Installing a hand painted garden sign to your school garden is a great way to add some color and really invite your school and community into your garden. One of the best ways to do this is to have your local hardware store cut an 8x1" board into 10" shingles. This is the most economical and simplest way to get pieces of high quality wood for your sign (craft stores will sell shingles of wood for $3 a piece! That's way too expensive!) Once you have your shingles, drill a 1/4" hole in each of the 4 corners. Paint your sign, and mount to any chainlink fence with an outdoor zip tie at each corner! This way, if a single letter breaks or a piece of zip ties fails, you can easily replace the letter or zip ties.
Of course, if you don't have a fence around the outside of your garden, you can mount the sign to any large and easy to see surface (a shed makes a great message board!), or onto the garden boxes themselves.

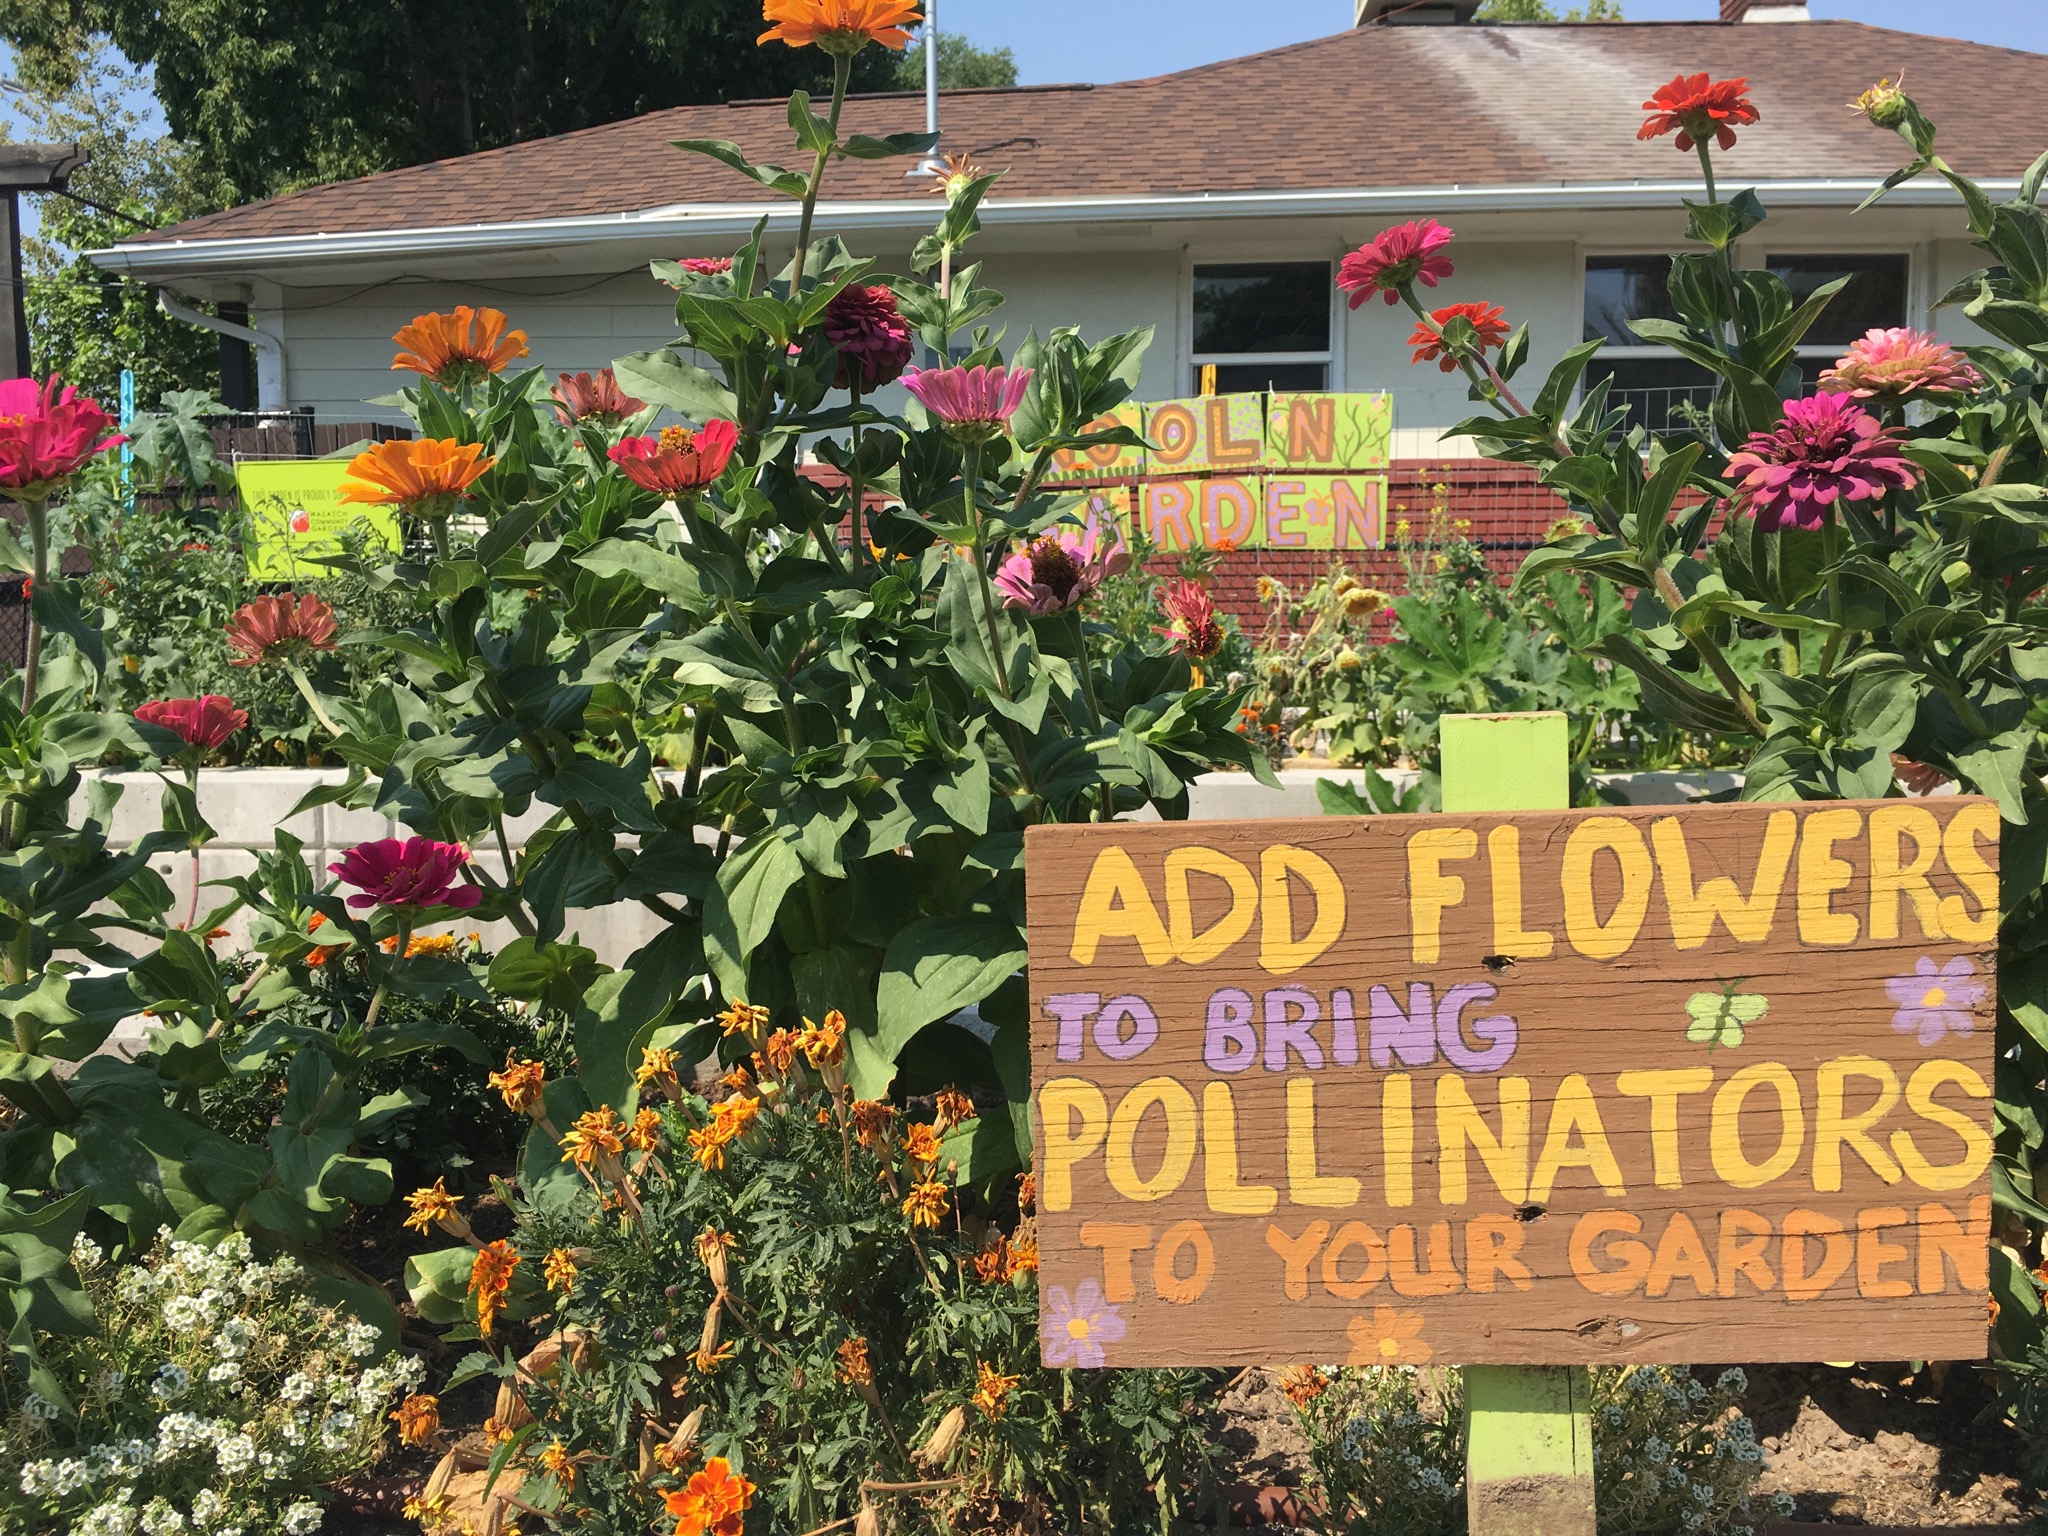
In addition to a garden sign with your gardens' name, it is also a great idea to include other informative signs!

Teaching Shed
Check out this video-tour of a delux teaching shed at Mountain View Elementary
Check out this video-tour of a simple teaching shed at Linclon Elementary
If you are installing a tool shed or box, be sure to consider that you are building an education garden. Sure, you might need a bunch of wheelbarrows for your initial build, and for a work party every now and again, but does your garden have the capacity to store four wheelbarrows? Does it need to? Are there parent connections you can tap into for tools? You should design your tool shed (or tool chest) for what the garden needs on a daily basis. Maybe it will contain a bunch of colored pencils, some good picture books, and a small kitchenette, or maybe it will contain a bunch of hand trowels and some posters of bugs. However you decide to design your shed – make sure it fits the needs of your garden.
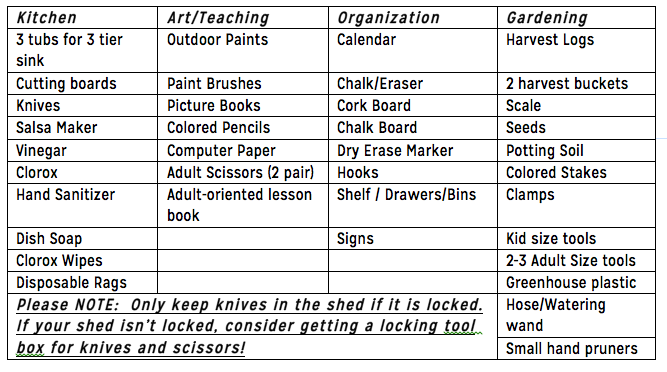
Consider this checklist a good starting point for any school garden. Although it may look like a lot to handle, it easily fits into an average tool chest, and cost less than $150 to put together. If you have extra space and funds, consider a potting shelf, workstation, gardening gloves, or a more elaborate kitchenette! The sky is the limit with your tool shed.
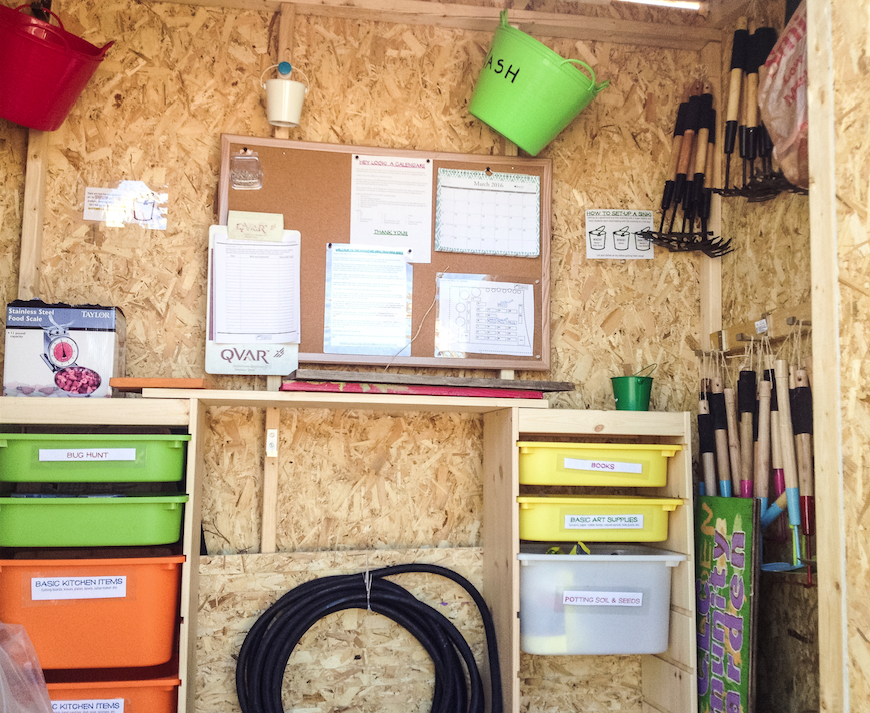
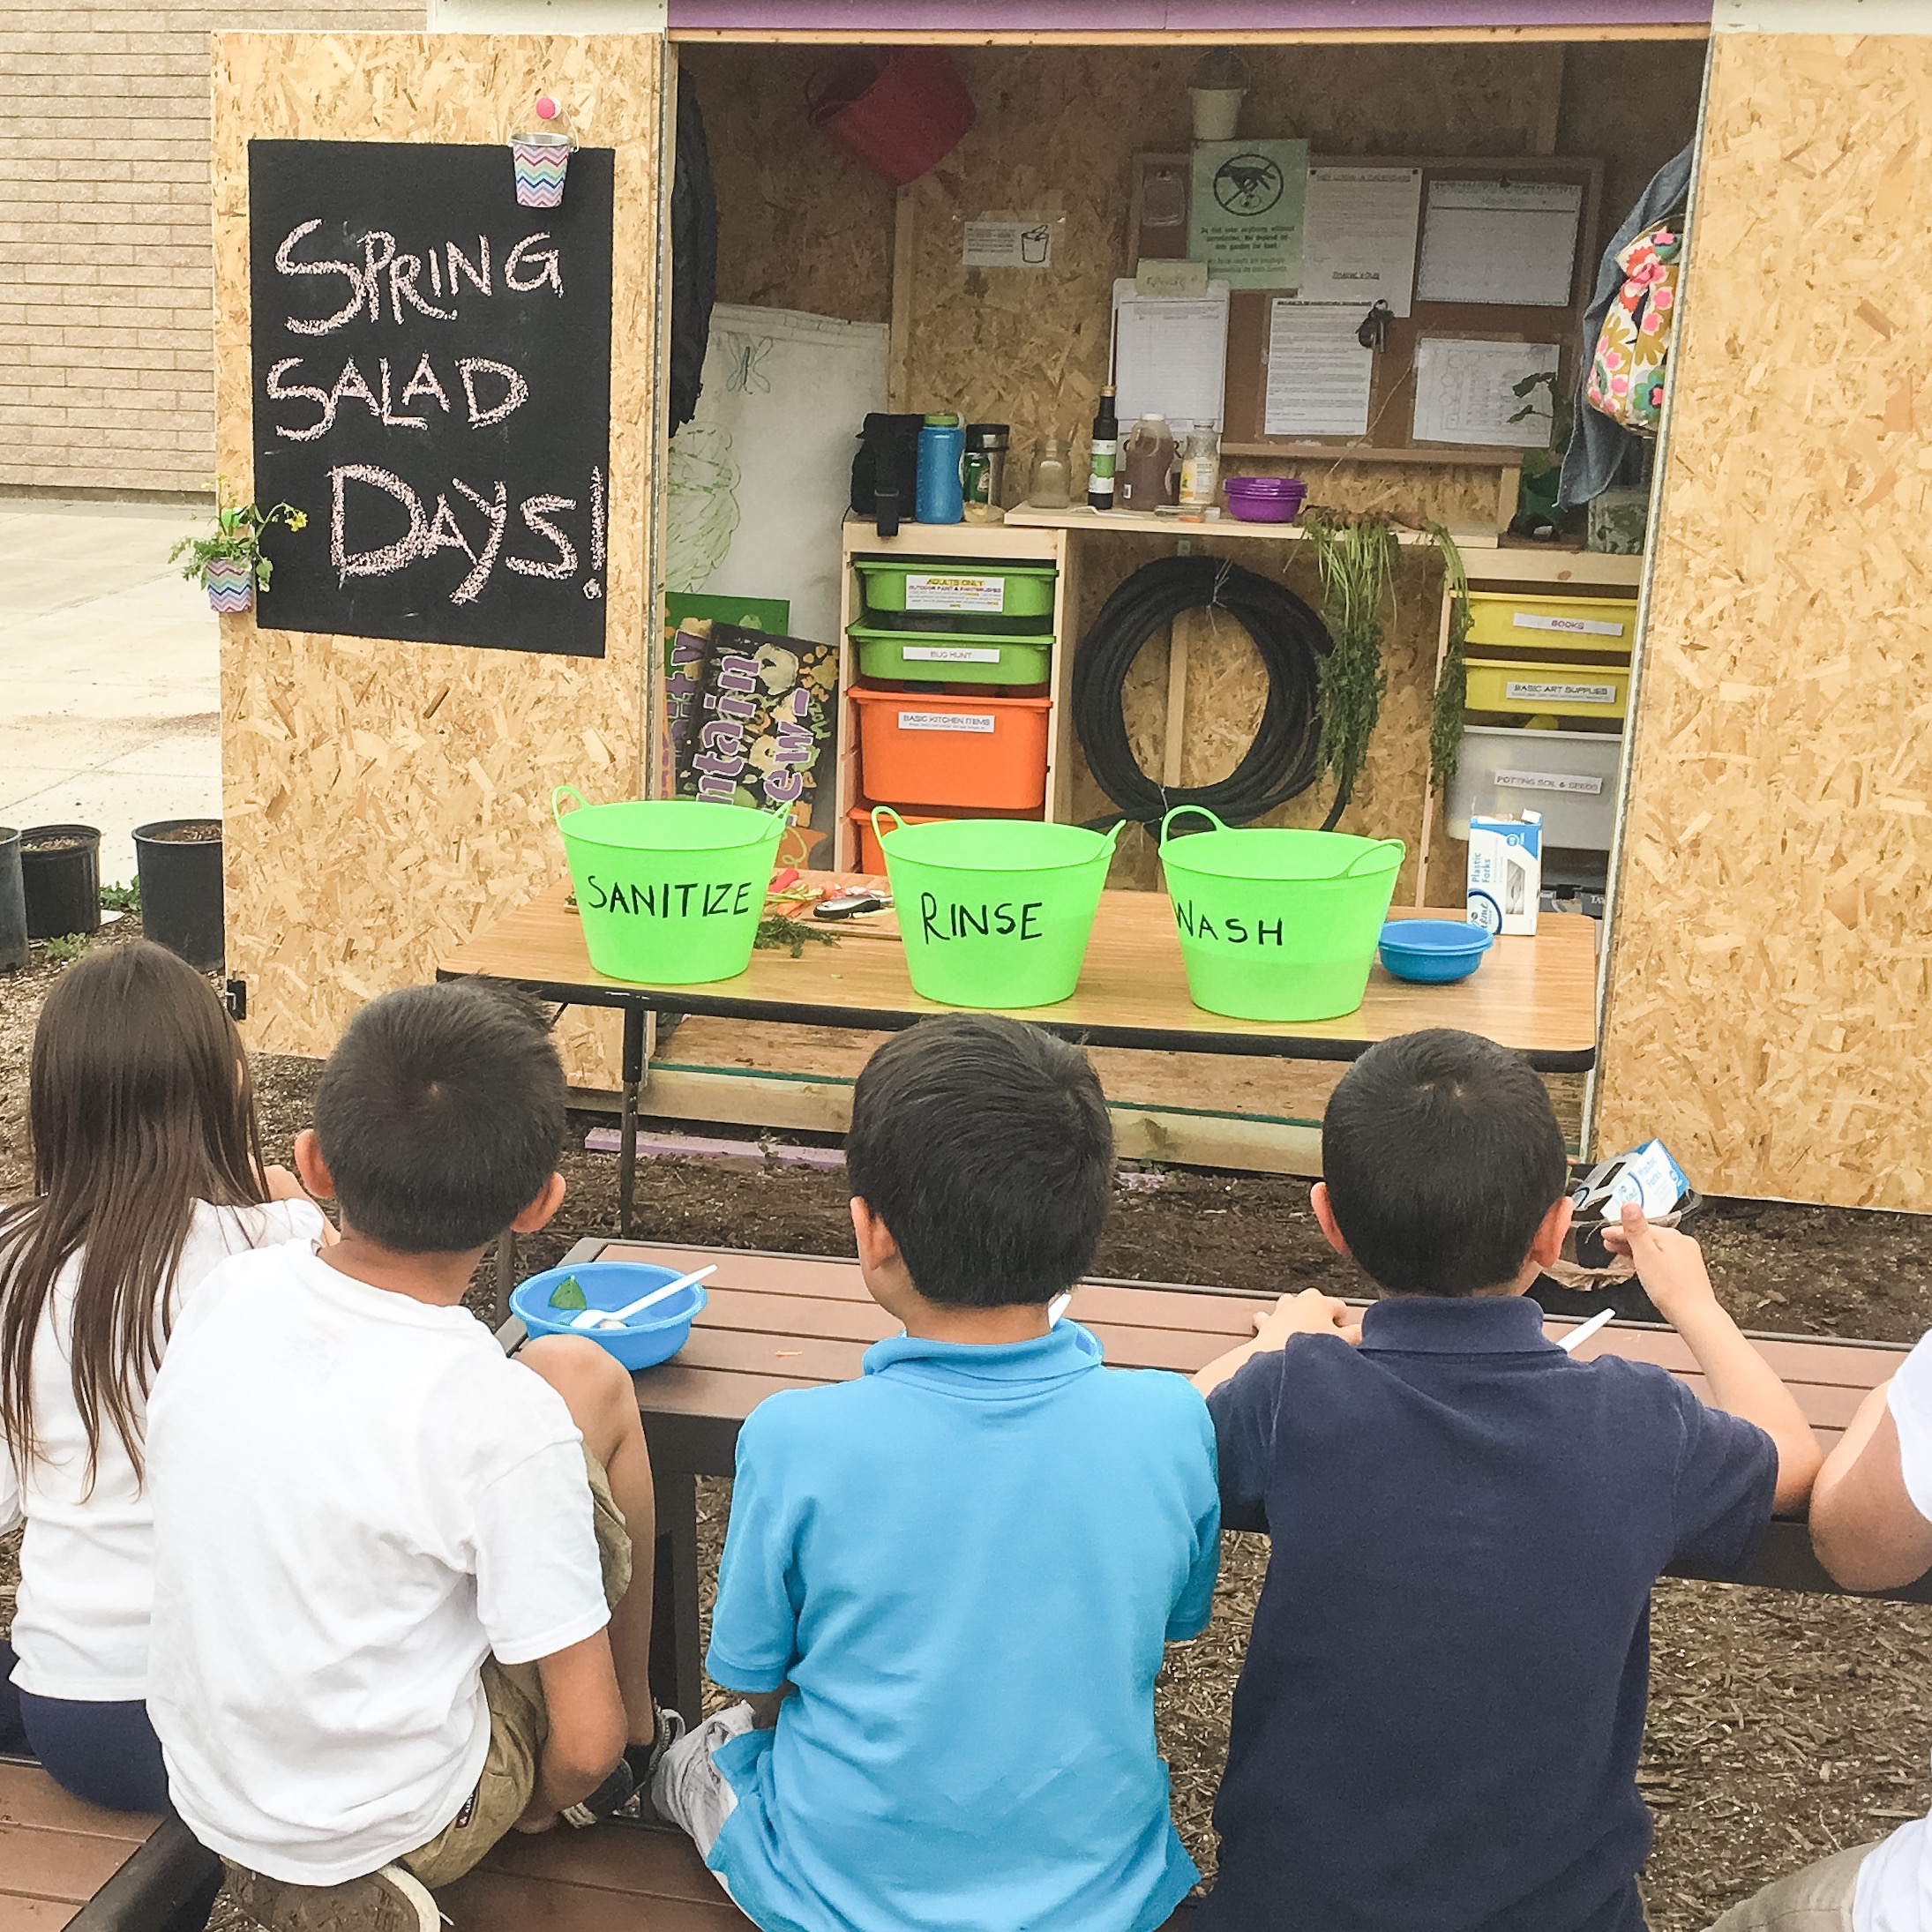
The Mountain View Shed contains all the suggested items, and includes a workbench, corkboard, and the inside of the door is painted with chalkboard paint – which makes it perfect for outlining the garden activity or garden rules!
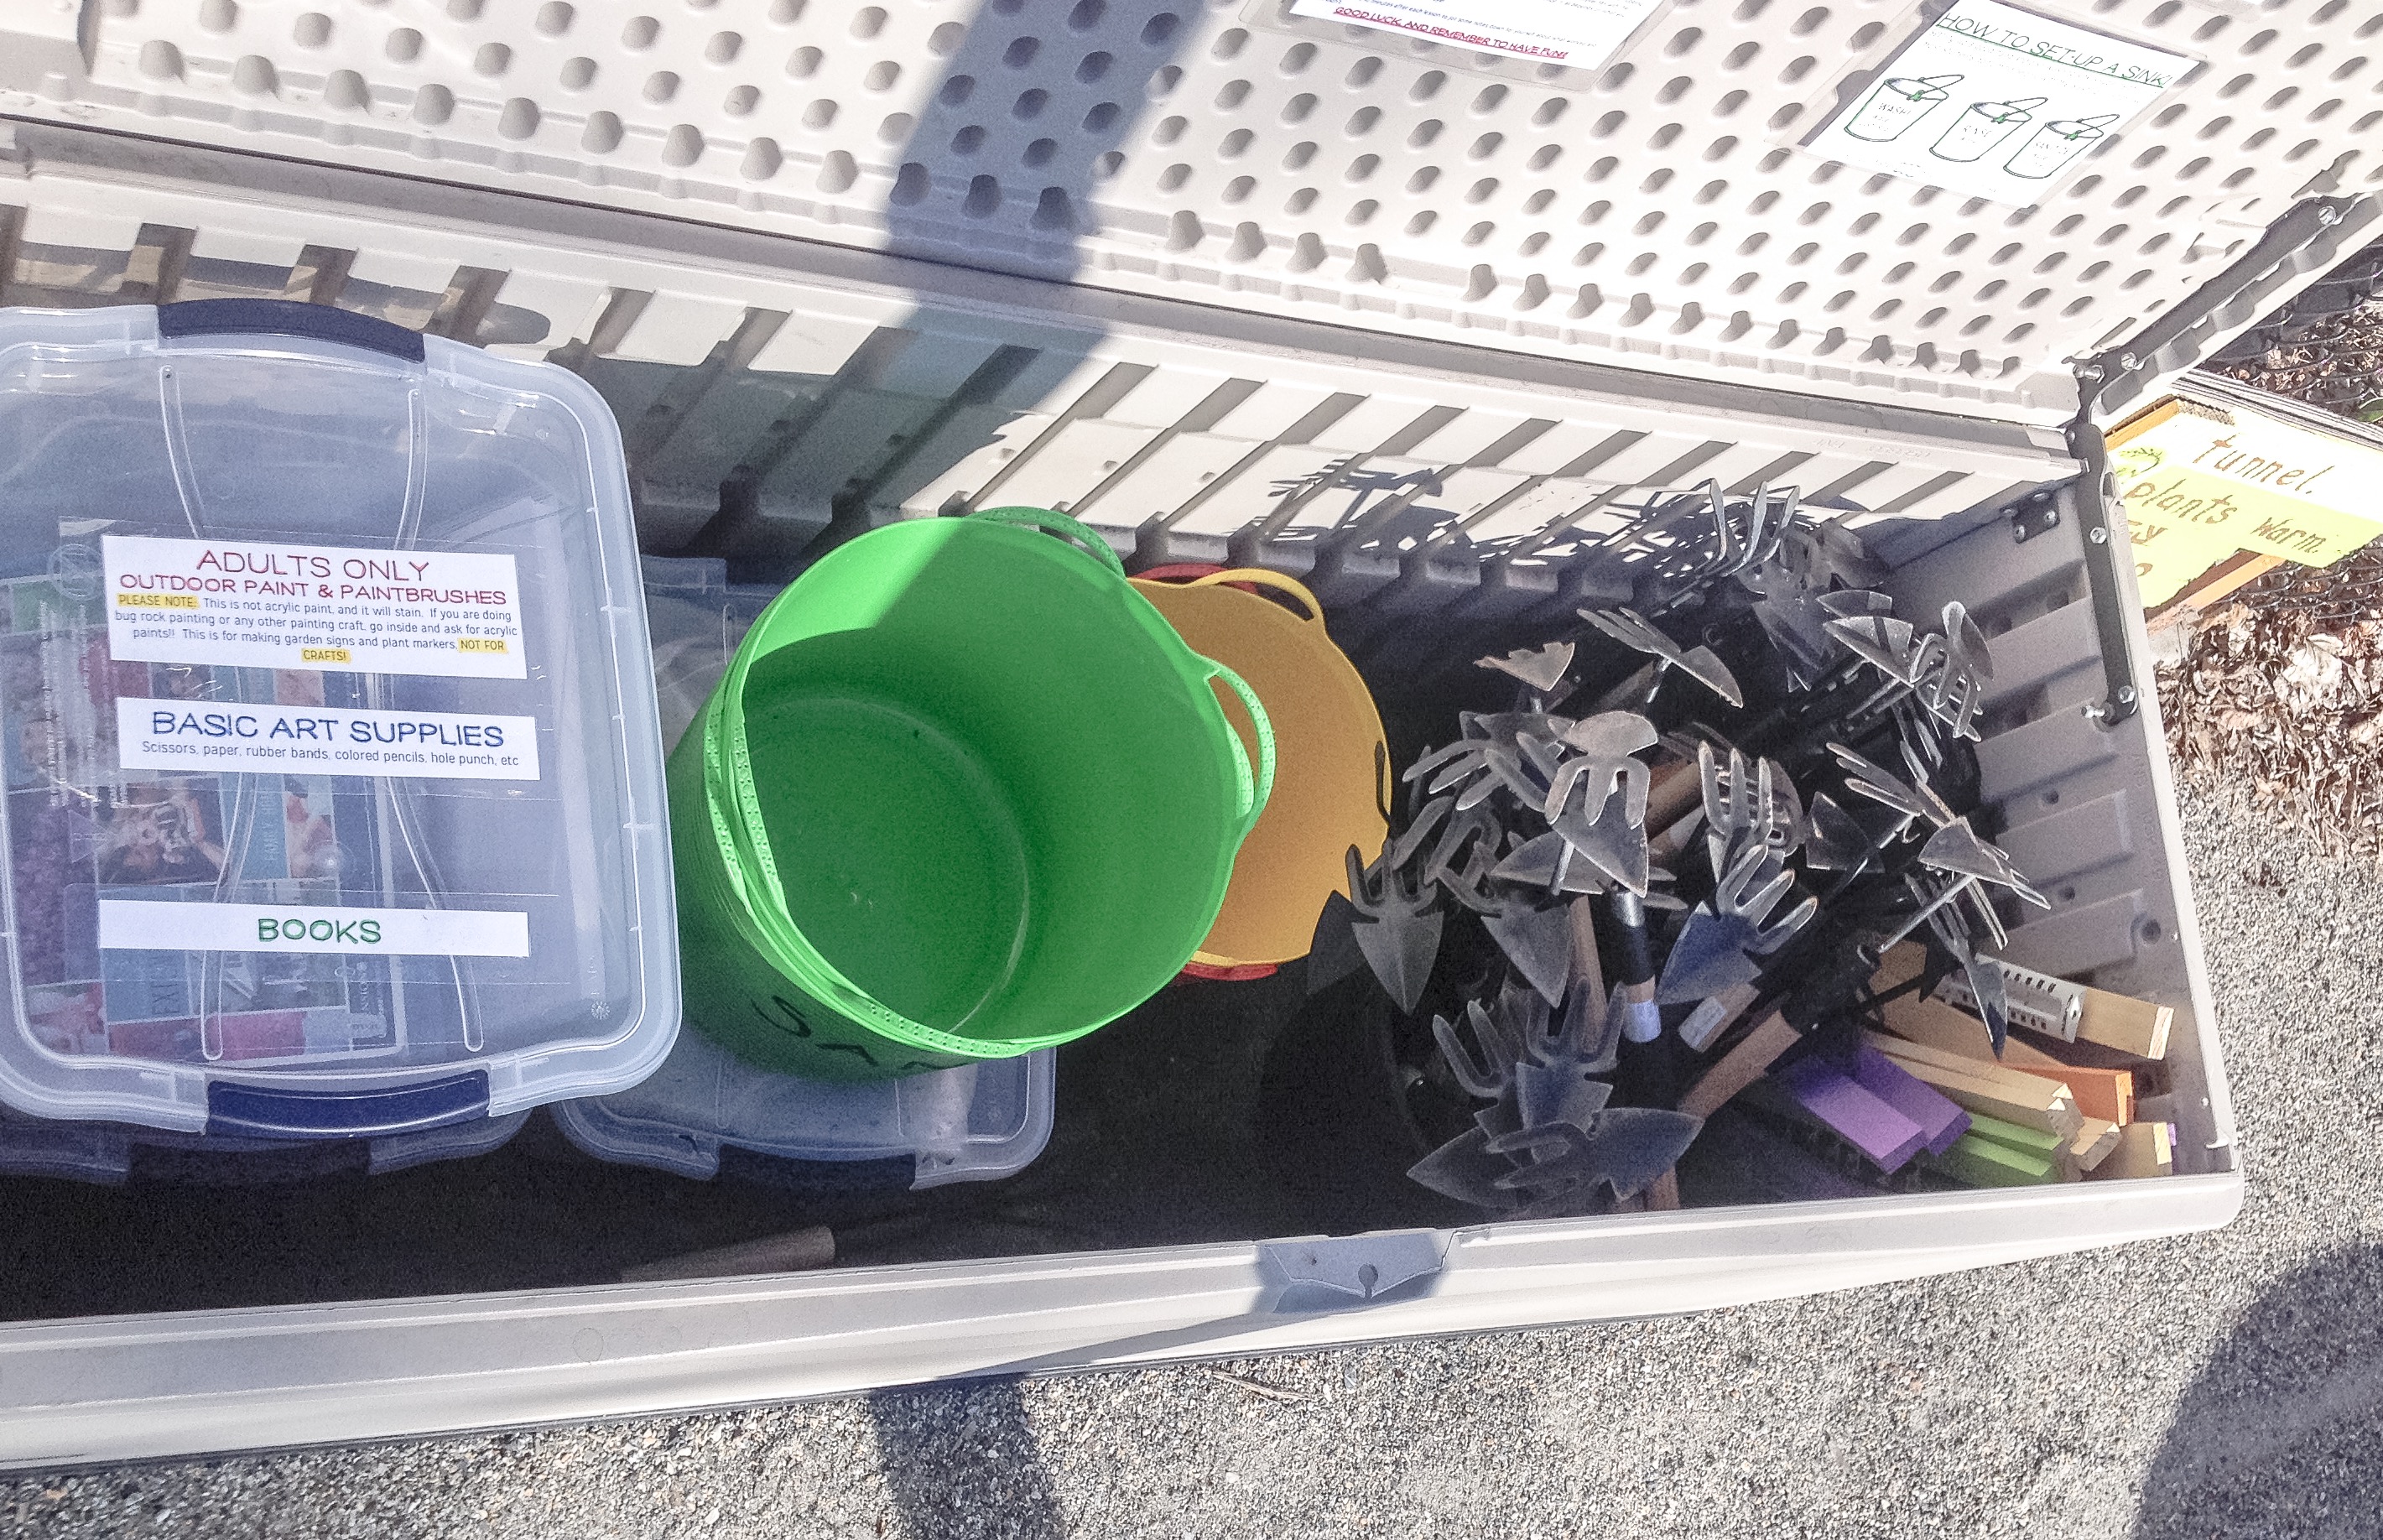
Most of the suggested items fit into a simple tool chest at Lincoln Elementary (minus the corkboard, chalkboard, and adult-sized tools). The kitchen items fit into one bin, the art/teaching supplies into another, the totes and tools are in separate buckets, and there is a final bin with clamps and greenhouse plastic for low tunnels!

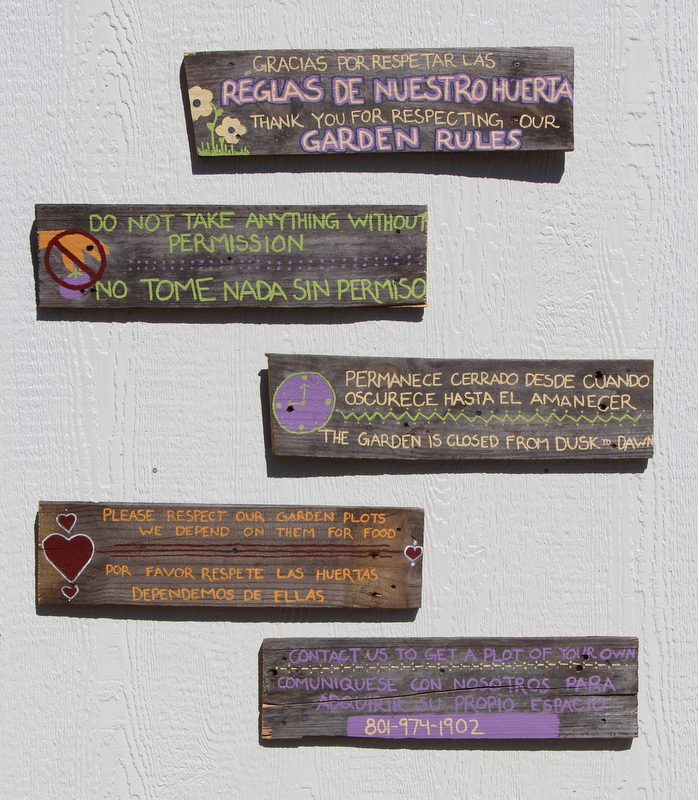
Be sure to label all the items and areas of the tool shed. Although it might feel nit-picky, people generally feel more empowered to use something if they know how it works. Good, clear signs are key to making your shed accessible to anyone. The following links are the garden signs that WCG uses at their gardens. Use them as-is or create your own!
- Teaching Shed Introduction (including how to set up a garden lesson!)
- Teaching Shed Signs
- Setting up a Garden Sink
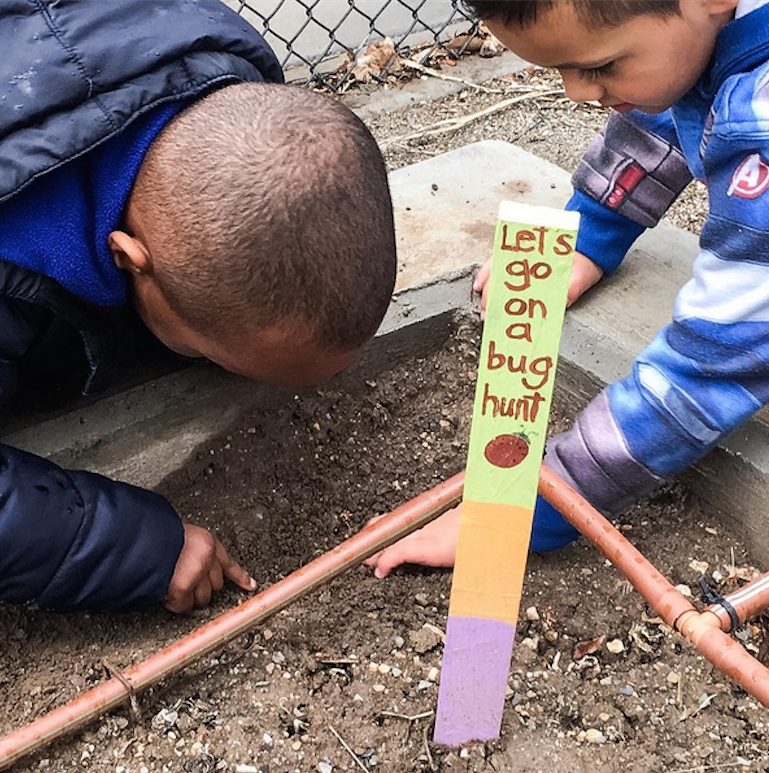
- Going on a Bug Hunt sheet for garden shed
Outdoor Classroom
Developing an outdoor learning space can be as elaborate or as simple as you can ever imagine. There are a few key features of any outdoor space:
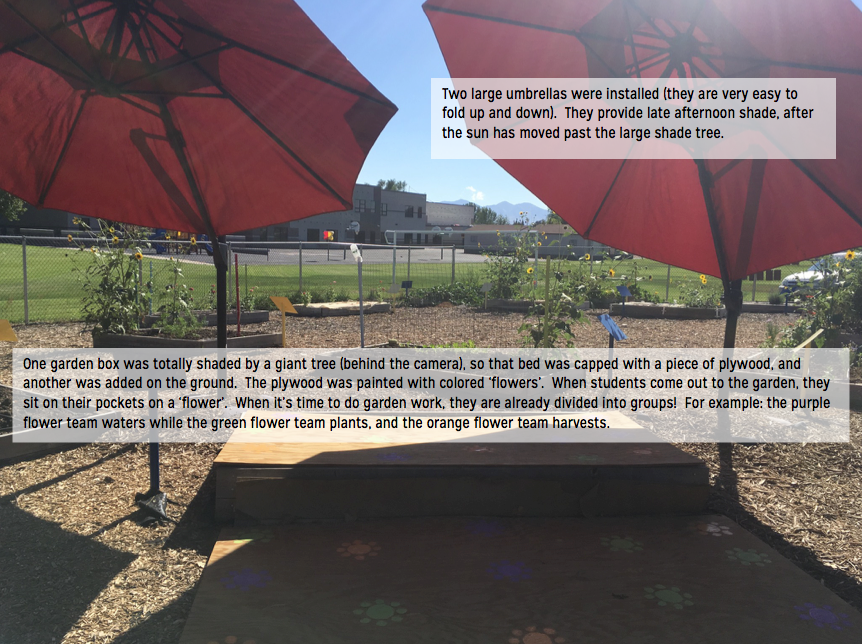
- Shade: Both you and your students need to feel comfortable no matter what time of day
- Seating: Whether you can afford a bench or you have an outdoor carpet, having a place where students go to gather is essential. A sheet of plywood with painted icons is cheap and simple! Have students sit on their pockets on an icon – it should help corral their wiggles and if the icons are painted different color, students are already divided into groups for garden tasks!
- Table: Whether you keep a folding table in your shed or you have a table installed by the outdoor classroom, a table is where the outdoor sink gets set up, where veggies get chopped, where handouts get set down, and where experiments happen.
Outdoor Classrooms can be as diverse as school gardens themselves. Here are a few examples of simple outdoor classrooms from around the Salt Lake School District:
Escalante Elementary:
Mountain View Elementary:
The Mountain View Elementary Garden has super nifty benches with small tables attached to the front where the students can work on garden worksheets or have a snack. The benches are not anchored, so they are easy to move around the garden. The teaching shed has a black board on the inside door, and acts as a garden classroom when the benches are arranged in semi-circle in front of it.
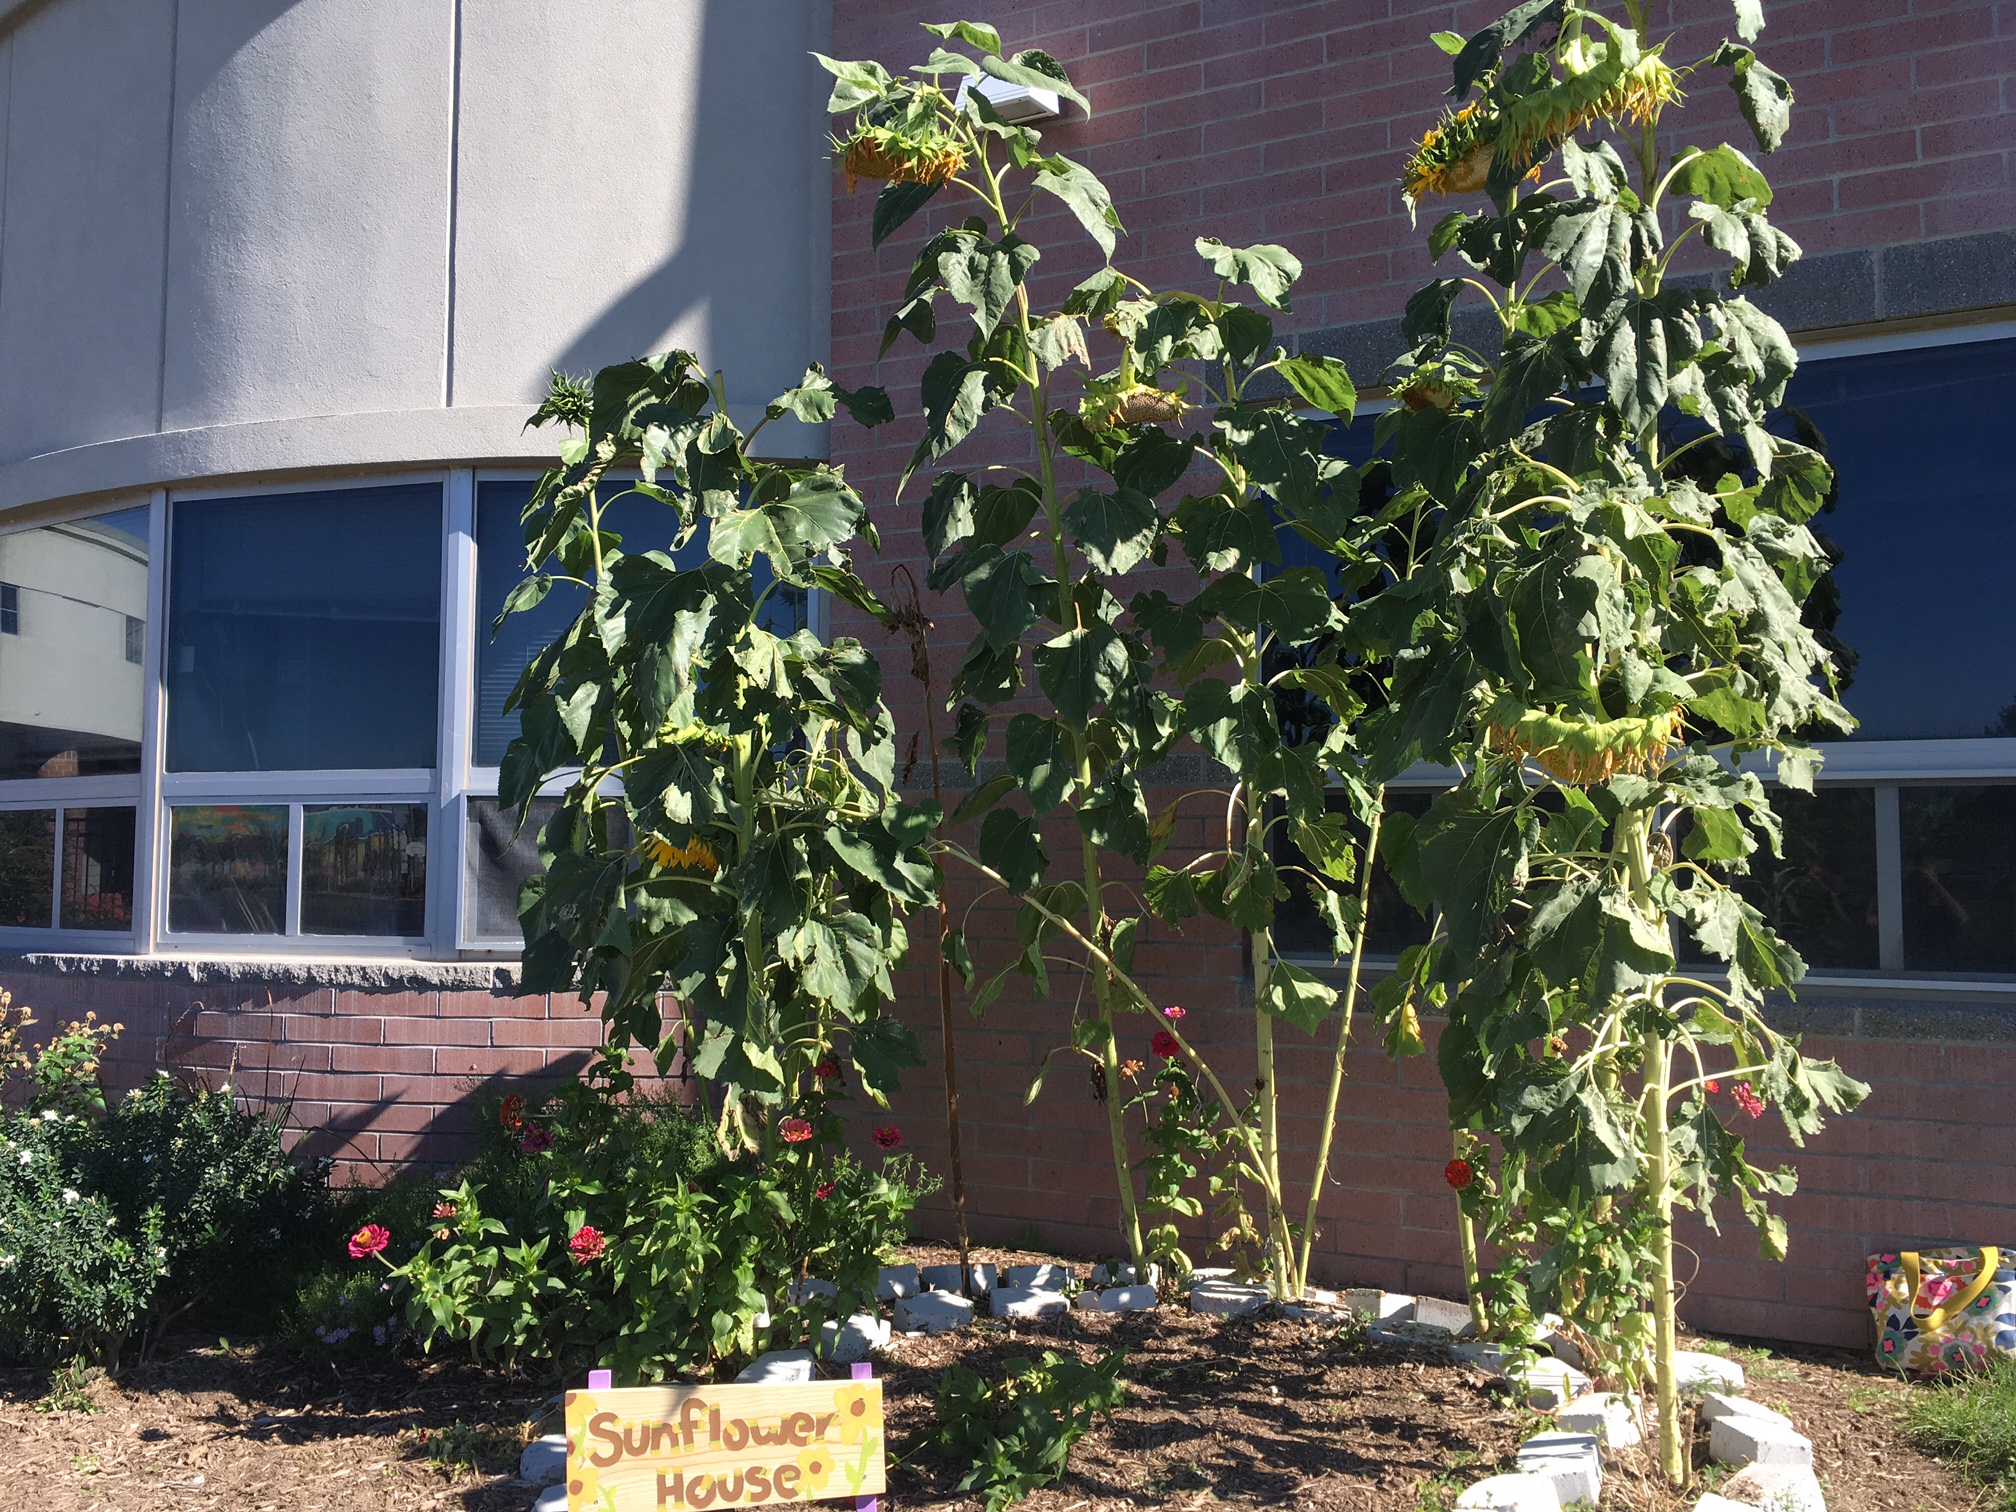
Sunflower House
Sunflower houses are an excellent and very easy way to add a bit of whimsy to your garden. Not only are sunflowers easy to grow, they also offer lots of really fun learning opportunities. From identifying the parts of the plant to saving the seeds, sunflowers are a super fun plant to have in the garden. While planning your sunflower house, try inter-planting the mammoth sunflowers with smaller flowers such as zinnias, marigolds, and teddy sunflowers. These other flowers are all easy to direct sow and grow from seed, and will add color and bring other kinds of pollinators (bees, butterflies, hummingbirds, and other song birds!) to the garden!
The Sunflower House at Riley Elementary School in Salt Lake is located in an ornamental landscape bed. The garden boxes at Riley were too small to accommodate a sunflower house, so the faculty worked with the grounds crew to identify a spot in a landscape bed. The result is adorable:
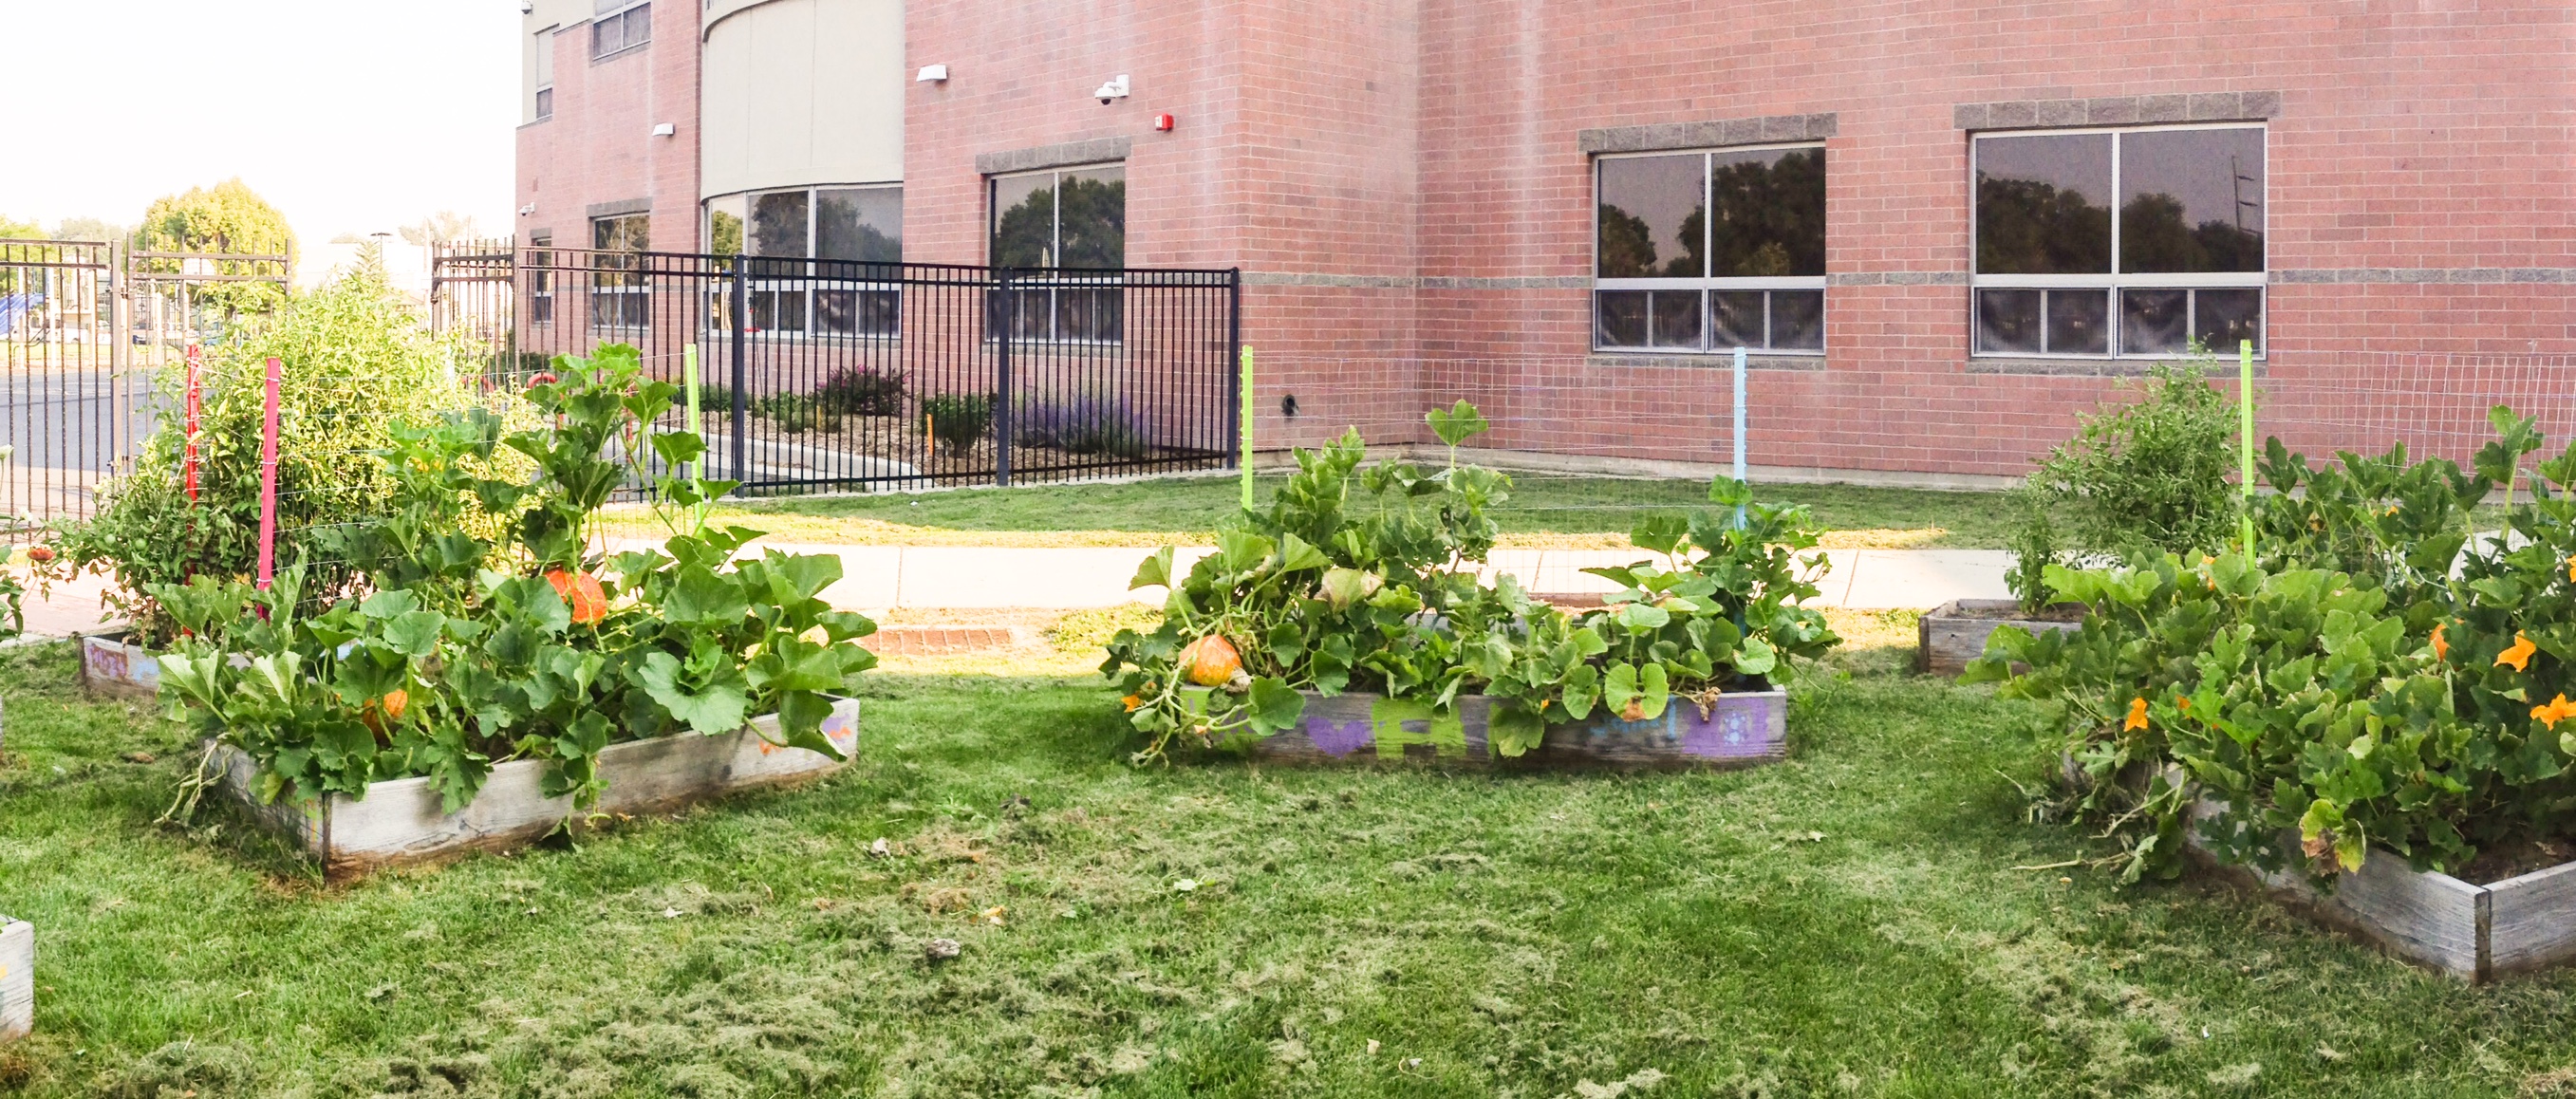
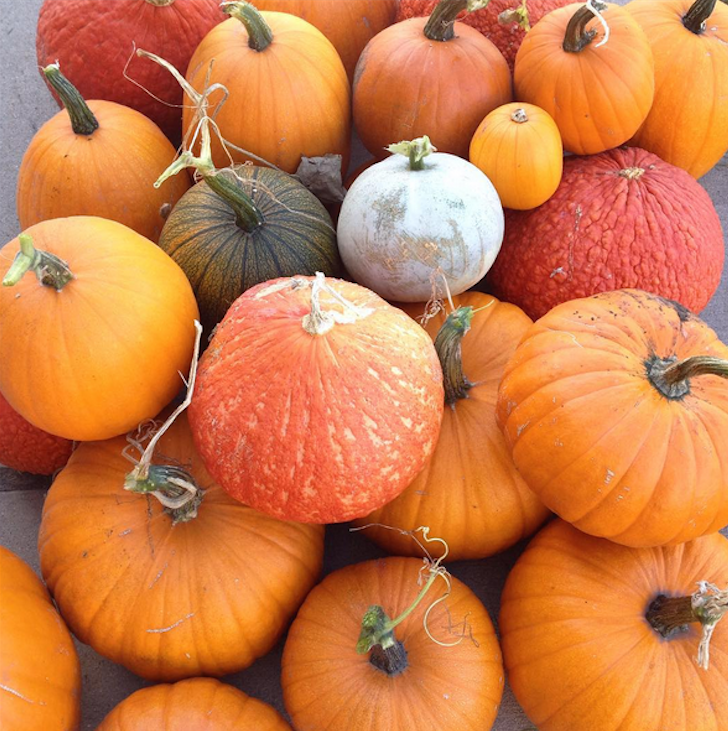
Pumpkin Patch
Pumpkin Patches are the #1 most useful feature in any school garden. Not only do students LOVE to watch the pumpkins grow, they grow easily from seeds (cheap!), there are lots of super fun pumpkin lessons, and they hardly require any summer maintenance.
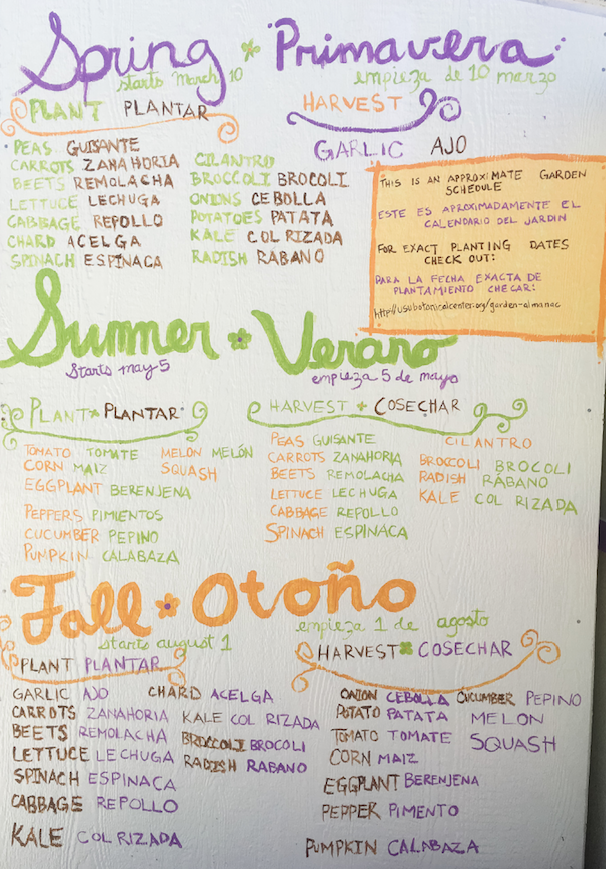
When considering that Salt Lake City has three major growing seasons (spring, summer, and fall), pumpkin patches an ideal summer crop. They get direct sown just after spring crops are maturing and getting taken out of the garden, and you can direct sow fall crop seeds under the shade of the pumpkins leaves.
For a video on How to Start your Fall Seeds Under Your Pumpkin Patch click here!
Trellising
Trellising Basics
One of the challenges of urban gardening is limited space. Trellising is an especially useful technique because it allows urban gardeners to utilize vertical space. Trellising vegetable plants helps to keep crops off the ground resulting in cleaner fruits that are less susceptible to rot, to certain soil born diseases and insects and to ground dwelling pests. Trellising also makes for an easier harvest and can be used to satisfy aesthetics preferences such as covering unattractive fences with flowering vines or welcoming garden visitors with a lushly arching entrance arbor.
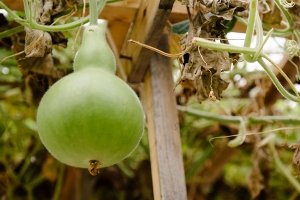
Fruit and vegetable plants that are commonly trellised include squash, pumpkins, cucumbers, melons, gourds, beans, peas, raspberries, grapes, tomatoes, and sometimes peppers and eggplants. Gardeners also often use trellises for flowering vines or for ivy plants.
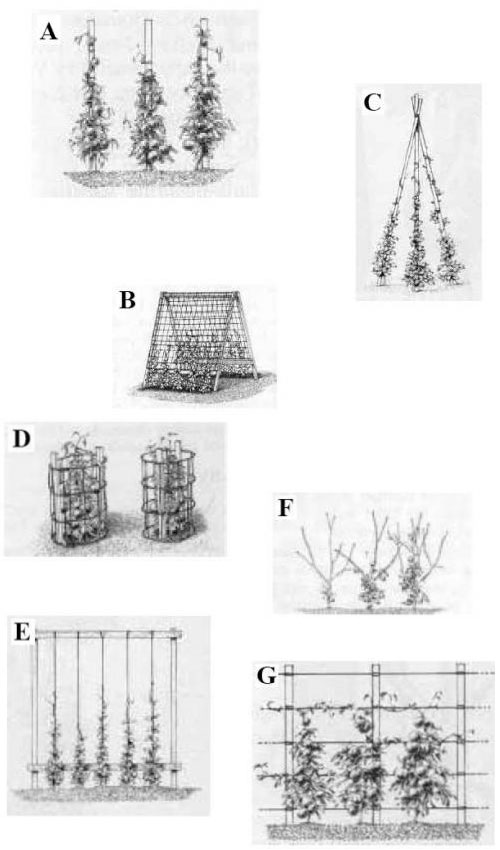
There are many trellis designs to consider. They include: teepee, A-frame, basic stake, double-armed T, square wire frame, cage, fence, branch, staked row and string, and living companion plant trellises (such as corn stalks for beans). However, you needn’t limit yourself to existing styles. Be creative, there are dozens of possible trellis designs. If creating your own, make sure they are sufficiently strong to bear the weigh of your mature plants in varied weather. Also remember to include large openings in your design for easy harvest. If you choose to use trellises, set them up in the garden before planting to avoid damaging plant roots and match the trellis with the plant. Different trellis varieties are discussed below with each respective plant type they best accommodate (this handout will focus on peas, pole beans, and tomatoes).
Trellising for Legumes (Leguminosae)
Peas - One of the first signs of spring is the pea trellis raised over the thawing soil. There are a few commonly used trellises that work well for peas: the A-frame, the staked row with wide-meshed wire, or the simple branch or stake trellis. A-Frame Trellis: Lean two wooden 4 by 5 ft. frames covered with wide-meshed wire or plastic mesh to make the letter “A” when viewed from the side (see picture below). Fasten the frames at the top with wire or hinges to stabilize the structure. Then simply sow your peas along the bottom of each frame at the desired depth and spacing.
Staked Row/Wide-Meshed Trellis: Sink 5 ft. tall stakes or poles into the ground at a depth of a 1-2 ft. and spaced every 3 ft. Pull tight and fasten the “sheet” of mesh at each stake/pole using a staple gun or wire for the length of the bed. Sow peas directly underneath and on both sides of the meshed trellis.
Branch: One of the simplest trellis structures for your peas is the discarded branch. Find branches that have 2 in. diameters and that twig out from the main limb after about 1 ½ ft.—sinking the limb into the soil at a depth of 1-2 ft. Sow peas at the base of the branch.
Beans - Bush beans will require no staking or trellising, so either read your seed packet to see which you have, or choose seeds according to which growth habit you are seeking for your garden. For pole (or climbing) beans, there are several popular ways to trellis: the teepee trellis, the single stake trellis, the A-frame trellis, the living corn stock trellis, and the wooden frame/vertical wire trellis. Pole bean trellises will require 8 ft. tall poles, stakes or frames. Otherwise their construction will be similar to those mentioned in the “Peas” section. Pole beans especially like simple vertical wires or poles to climb with no horizontal lines to interrupt their path. Be sure to set up the trellis before you sow your beans--after the average last frost date (once the soil temperature is over 65 degrees). Sow several seeds around each pole or stake and thin down to three when seedlings start to get larger. Keep up with picking to ensure that the plant keeps producing more beans.
Teepee: Place three poles together like a teepee and tie them together at the top with stout twine or wire (see below). The poles should be at least 8 ft. tall.
Single Stake: Drive a 9 ft. stake or pole into the soil 1-2 ft. deep and sow bean seeds directly underneath. The beans will wind naturally around the pole so no additional twine should be needed to hold the plant up.
A-Frame: Follow the same design as the pea A-frame trellis using the dimensions of 4 ft. wide and 8 ft. tall.
Corn Stalk Trellis: If using the living corn stock trellis, sow corn at least 2-3 weeks prior to sowing your beans so they’re sufficiently strong and tall to hold the beans when they begin to vine. The corn stalk will serve as a support beam for the bean plants, while the nitrogen fixing beans help to replenish the soil with nutrients that the heavy-feeding corn depletes. (This is a form of companion planting and represents two of the elements of the Three Sisters garden.) Corn should be spaced roughly a foot apart with two seeds per hole planted at a depth of 1 inch.
Frame and Wire: Follow the directions for the bean A-Frame trellis above but make only one frame. Attach each side to 9 ft. stakes, posts or poles that are sunken into the bed 1-2 ft.
Trellising for Tomatoes (Solanaceae)
Most gardeners trellis their tomatoes, particularly the vining type which are known as indeterminates. You can choose simply to let your tomatoes sprawl out on the ground, but doing so will increase the risk of damage from pests and disease and will make harvesting much more difficult. If you decide not to trellis your tomatoes, mulch well underneath the plants to keep fruit from contacting the soil or being eaten by ground pests. Many types of trellises will work for your tomatoes.
The Tomato Cage: The most common tomato trellis is the cage variety with openings large enough to harvest through. Sinking two or three additional stakes on the inside of a cage will reinforce them to the extent that a tomato laden with fruit will be held sturdily (see below). Recognize that the typical cone-shaped wire tomato cage, which is under 3' tall when sunk into the ground, is not sufficient to support most indeterminate varieties, which can reach 5 to 8' in height. If making your own cage, bend a 6 by 5 concrete reinforcement wire mesh to make a circular cage. A variant of the wire tomato cage is the wooden box cage that is essentially the same design except square instead of circular and constructed with wood instead of wire. Be sure to avoid wood treaded with toxic chemicals. Wasatch Community Gardens offers a tomato caging and trellising workshop in our teaching gardens during most years. Check out our workshop calendar to learn more!
Post and Mesh or String: Another popular trellis for tomatoes planted in rows utilizes single 5-8 ft. tall 2 in. diameter posts sunken 1-2 ft. into the ground with sheets of plastic or wire mesh (trellis netting) fastened (stapled or tied with wire or twine) to each post and spaced 4 to 5 ft. apart down the row. Cattle panels can also be used and are a reasonable investment that will last for years. Make sure the mesh has large openings (6" minimum) to make harvesting easy. If you don’t have mesh, you can tightly loop lines of twine around each post down the row in horizontal fashion every 6-12 in. up the post. This method is known as the Florida weave, and we learn/practice this method in our caging and trellising workshop. When using one row of posts and mesh/twine, you may want to gently tie main vines to the trellis with a soft twine for extra support. If you’re planting 2 rows of tomatoes down a single bed, they can be sandwiched together in between two rows of posts and mesh/twine (see below).
Basic Stake: If growing tomatoes up a single vertical stake (2 inch in diameter), prune the plants to one main stem and clip off the suckers that grow between leaf stems and the main stem. If using stakes, you’ll need to tie the main tomato vines with soft but stout twine to the stakes using a lose knot to avoid damaging the stems. Each 6 ft. tall 2 in. diameter stake should be placed 2 ft. apart and sunken 1 to 2 ft. deep (see below).
Overhead Suspension: If you have the skill and materials to build a frame over your tomato bed, you can trellis indeterminate tomato vines up a string hung from an overhead support (see sketch "E" below). Wood, PVC pipe, and metal electrical conduit are all possible materials for the frame. This is the method that is used at the Green Phoenix Farm at Wasatch Community Gardens, where we grow hundreds of tomato plants each year.
Trellising for Cucurbits (Cucurbitaceae)—Melons, Squash, Gourds, Pumpkins and Cucumbers
Most melons, squash, gourds, cucumbers and pumpkins take up a lot of space, as they tend to vine and sprawl out vigorously in the garden. Most cucurbits can be grown vertically to save space; however, summer squash do not have climbing tendrils, so training them to grow vertically requires extra effort and some special techniques. Teepees, A-Frames, and fences do well for cucurbits; however, most trellis designs will accommodate these opportunistic plants (follow building directions under the other sections and see pictures below). Varieties of winter squash and pumpkins that will weigh over 10 to 12 pounds at maturity may be better left to sprawl on the ground because of the strain they will put on a trellis.
A- Basic Stake
B- A-Frame
C- Teepee
D- Cages
E- Frame &Wire
F- Branch Trellis
G- Post & Wire Row